
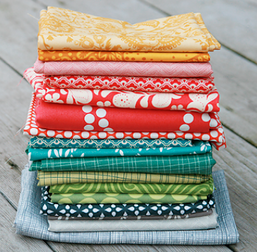
 Quilts of Valour qualify if they are of certain sizes and hand or machine quilted. Contact Quilts of Valour Canada for more information Quilts of Valour qualify if they are of certain sizes and hand or machine quilted. Contact Quilts of Valour Canada for more information Sadness. We all sometimes experience it.
Recently I awoke to realize I had been feeling a little blue. I was having difficulty getting motivated to do even the things I love to do. “Why not do some quilting?”, she asked herself. Sigh. I just couldn’t get started. I even mentioned it to my guy who of course told me maybe I should take a break and not be so hard on myself. (Hmmm does he even KNOW me?) After a day or two of bumbling around doing well, not much, it dawned on me! I checked the calendar and realized it was the day before the 11th anniversary of the floods of Alberta - an event I was heavily involved in as a first responder. (Yes this is me here!) AH Ha! I now understood the sadness. It was a major milestone in my life - and I had to work very hard to stop measuring my life by referring to events that have happened in terms of before or after “the flood”. Many of us have experienced disasters, trauma or losses in our lifetimes. It is these memories and experiences that are stitched together in our souls that makes us the fabric of who we are. Estimates say that as many as 75% of all North Americans have experienced some sort of trauma in their lives and many of those who have experienced trauma are our veterans. One of the many veterans in the US and Canada that has taken up quilting to help him with the effects of trauma is Andrew Lee. After 2 deployments in Iraq he suffered the effects of PTSD. He talks on his web site Combat Quilter of how he creates quilts and donates them to an organization called Quilts of Valour that in turn distributes them to veterans. Lisa Compton, who served first as a Canadian Armed Forces Nursing Officer in Kandahar, Afghanistan, also speaks about the healing journey she took after receiving a quilt. She then took up quilting as part of her PTSD healing journey and is now President of Quilts of Valour Canada. This is an amazing organization and you can read more about it here. Incidentally, one of the women who attended a recent workshop I taught is a representative for the Newmaket area, for Quilts of Valour. Naomi and Mike Babineau have been working with QOV since 2019. Naomi is an area representative and Mike is a presenter. (look for her on facebook) Utah State University reports that “participating in activities during leisure or spare time has been shown to reduce stress levels. For instance, one study showed approximately 75% of participants’ cortisol levels (one of the most widely studied hormonal markers of stress) were lowered after making art.” You can read more about this here. Despite our ability to move on and heal from emotional events and trauma, there is much research that supports the fact that our bodies carry these memories over our lifetime. We can subconsciously remember dates and times and those memories can cause a physical response. Sadness is one response. For me, I don’t want to label this sadness as depression - because it happens every year on or near the 20th of June for me. And as quietly as it appears, it also leaves on its own. Just being aware that the reason for the sadness is because of the past experience - helps me to be kinder to myself - enjoy a bit of nature - maybe wrap myself in a quilt - snuggle up with a warm beverage and read a good book. Sometimes however, the best remedy to feeling sad and wanting to isolate - is to do something for someone else. Maybe it is time for me to make a quilt to donate to Quilts of Valour Canada. Yes. Yes. I think I will.
0 Comments
Are you laughing yet - or looking in the mirror! In all seriousness though - there are a lot of things you can quilt! Last year a customer sent me 3 meters of 2 separate christmas fabrics she wanted quilted together so she could make placemats and table runners. (Brilliant idea!) And right now I am in the middle of quilting a bedspread out of wideback material - front and back. It is one of a kind and gorgeous! For a quick gift I also quilted a beautiful fabric I did not want to cut up and backed it with 'fireside' backing in white. It was so soft and beautiful I almost couldn't give it away. A friend of mine ( a long armer ) was hired last fall to quilt meters and meters of velvet in large diamonds for display windows for Sephora. (Wow what people will quilt!) Last year I made large roman shades on my longarm - quilting the front to the back on the fold lines. And I am seriously considering making a quilted jacket similar to the one Kayce Musgraves wore on Saturday Night Live! I have often thought about repurposing vintage quilts into jackets - an up-cycle trend that is catching on across North America. Quilted fabric is like a big hug. There are lots of great things you can create! Edge to Edge computerized patterns offer thousands of designs - and are very affordable. In fact quilting 2 fabrics together (not as a quilt) is as reasonable as 2 cents per square inch. That means to quilt 2 fabulous fabrics together 2 meters long would cost about $75.00. So send along those fabrics you want quilted into quilted fabric - and then start creating!
 These techniques save a lot of time and simplify what used to be the tedious part of creating a quilt. Instead of cutting out hundreds of triangles we can create 2,4, 8 or more half square triangles (HSTs) with only a few seams, a rotary cutter and ruler. (See how here)
One of my favourite quilt patterns is the Double Irish Chain. This pattern, like many others, was developed around tools like the 2 ½ inch wide ruler and rotary cutter we use for strip cutting/sewing. Other tools like the 6 ½ inch ruler and specialized triangle rulers are key to some of the new, quicker assembly methods in the patterns that we follow. Chances are that there are not many new quilt patterns that are yet undiscovered. Every quilt block we make today may have been developed decades or even centuries ago. The new patterns that are available now use those patterns and employ new techniques to make piecing easier - but often with one drawback. Waste. I can’t tell you how it pains me to buy the fabric the pattern requires and to follow the directions only to learn that as much as half a square is cut off after sewing - and discarded. (sew and flip method). I was so disappointed finding many of the new patterns di this that I decided to stop buying patterns and develop my own. One such pattern I drew up, I did to highlight some beautiful fabric. It would be simple - a play on the rail fence quilt square - with a wider center strip. I used my 2 ½ ruler and my 4 ½ ruler and strip cut and sewed a 2 ½ inch + 4 ½ inch + 2 ½ inch strip set the WOF. (width of fabric). This created a strip set 8 ½ inches wide. To make a square I would cut this strip set into 8 ½ inch lengths making 8 ½ inch squares to put together to create a quick and easy quilt. So I did. And I was disappointed that I did not think ahead. After cutting the strip sets into squares I realized I could get 4 squares at 8 ½ inches with a leftover strip of 7 ¾ inches. Wow. What a waste. Yes I could put that into a scrap pile to be used some other day - NOT - (or donated). But I began to think how I could rewrite that pattern idea into something that would make better use of the fabric. I did a little ciphering, and realized if I changed the center strip to be 4 ¼ inches instead of 4 ½ , I could get a full 5 squares of 8 ¼ squares out of my strip set. AND NO WASTE! (See the new patttern here - My First Waltz) Over time I realized that one small change to technique or measurements on a pattern can often save as much as 25% of the fabric required for a quilt. All that can add up to $20 and sometimes $30 a quilt. I began thinking about all the patterns that are out there that could benefit from such a small adjustment so as to save fabric. And I found a second pattern that I adjusted. And that is how I began to rewrite history. I am on the quest to tweak and re-write traditional patterns and blocks to use fabric more economically while still using newer techniques that save time. (You can see a few here. ) AND - with the cost of fabric today it means instead of scaling back on what I love to do - I can continue to create quilts with abandon and within budget! It means using less fabric and having less waste. We live in a very affluent society but life for many who are retiring and living on a fixed income or those raising a young family are having to pinch pennies just to get by. Sometimes all we need to do is make a few adjustments here and there and we can still do many of the things we love. Rewriting patterns to reduce waste keeps me doing what I love! I think my Grandmother - who lived through the depression - and made dozens of quilts during that time - would be proud.  Many years ago I took coaching training from Jack Canfield. (Remember Chicken Soup for the Soul?) I learned a great success principle - a life concept called, "Clean up your messes".
The premise was that starting a project and not finishing it causes us undue stress. We carry the "failure to complete" around with us in our subconscious and it makes us feel unsuccessful. I know, I know, the project was not going well - so we stash it in a cupboard. Push it back to the very back, behind the hidden M&Ms, Fracktals or chip bag we have hidden away for those OTHER stressful moments. Maybe if we leave it there long enough we can forget how much we spent on it and how many hours we worked on it - only to have it look like..... well - let's just say it's not how we wanted it to look. Wonky corners. Wobbly borders. Colours that SUCK when put together. Stuff it, stuff it, back under the mending that has been there for years, back, back, back to the very back corner. Scrunch it up as small as you can! GO AWAY you terrible project! If we are lucky maybe we can find it several years from now and "DARN the mice got into it!" All kidding aside - every one of us has those UFO's. Unfinished Objects. Projects that we started and for some reason or another we abandoned. It really is OK. But all those projects weigh on us mentally whether we know it or not. SEW much STRESS. So, there is a solution. Clean up your messes. Recently I had a quilt order come in for a specialty quilt. A dragon. In a garden. Specific colours and quilting patterns. I spent waaayyy too much time on it and when the top was almost completed - I realized it was far too big. I had followed the pattern - but never really considered that it was going to be too big for a baby quilt. This one I could not stash away. And it could not remain unfinished. I had a deadline. Oh, what to do - what to do? Then I heard that inner voice say: "STEP AWAY FROM THE SEWING MACHINE. Yes. Step away. Take a break." Take a walk. Go outside. Call a friend. Listen to your favourite song. When all else fails - think about cleaning your house. That should fix things! We all run into issues once in a while when working on a project. But stashing it away only causes us more stress. In the back of our mind we know it is unfinished. A mess. Instead of stashing, take a break. Talk to a friend or someone who may have an idea or different perspective. Maybe even take it to a fellow quilter's home or studio and work on the issue together. Clean up the mess - finish the project. I cannot tell you how much better you will feel. Success IS IN YOU. Me? I took two days to do other projects and then BAM - it hit me. (In the middle of the night - of course.) The solution on how to get the quilt to look as I expected came to me when I was no where near the sewing machine. So, out came the "jack the ripper" and I started in on the alterations I needed to make to complete the project as I envisioned. Success. I dug down deep and found it. Yes - it is in me. (It's in you too!) 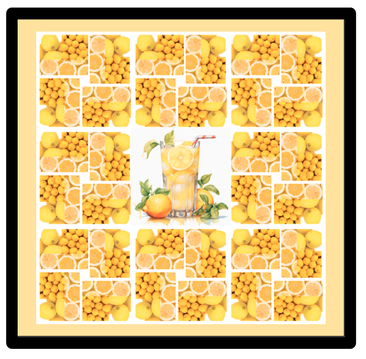 Wait! Isn't that backwards? Don't we make lemonade out of lemons?
I remember a new quilter telling me that her husband could not understand why she bought perfectly good fabric, cut it up into little pieces and then spent hours putting it back together again. "Why not just do a puzzle?" he asked. When you think about it logically he may have had a point. But a craft like quilting defies logic - and under the maker's hands, becomes a work of art. Lemons, as we all know, have many health benefits. One lemon contains over 50% of the vitamin C we need for one day. Lemons are also known to reduce high blood pressure, aid in digestion and have numerous other health benefits. Unfortunately lemons can be a little bitter all by themselves. So once cut up and mixed with a sweetener and water, we really have no desire to put them back together again. A quilt however, contains little bits of fabric - that may in the beginning, look a little like the pieces of a cut up lemon - a little sour. Not surprisingly many of the fabrics we put together may not appeal to us at all in the whole. And in fact in the beginning quilts were often made of old clothes, old curtains and bedding. A quilter would put them together with other fabrics and piece by piece - create a large piece of fabric (the quilt top) that is sweeter than how it began. The health benefits of quilting and finishing a quilt are both physical and mental. A finished quilt contains enough "vitamin - see" to pull just about any quilter out of the winter blues and warm toes at the same time. But the act of pulling little bits of fabric and sewing them together to make different shapes and even scenery can have even more health benefits than we know. Health professionals worldwide have studied the art of quilting and conclude that it can improve cognitive function, memory, and overall mental health. Quilting also provides a sense of accomplishment and pride, which can boost self-esteem and confidence. It also decreases stress levels and causes the feeling of a sense of accomplishment as it increases the neurotransmitters dopamine and serotonin - the reward chemicals in our brains. As a result, it also lowers the risk of heart attack and stroke. An entry in the Journal of the American Medical Association shows evidence that quilt making decreases the blood pressure, respiration, and heart rate. Over the last several years quilting has also been recognized as a powerful tool for healing trauma. It can provide a creative outlet for people to express their emotions and find peace. A simple google search will reveal scores of vets returning from front line combat who have healed PTSD through quilting. And that in my mind - is making a beautiful healthy lemon out of lemonade. |


Copyright © 2019, 2020, 2021, 2022, 2023 & 2024 This website may not be reproduced in any manner without express permission.
Please notify web master of any errors or broken links. Thank you.
Please notify web master of any errors or broken links. Thank you.