

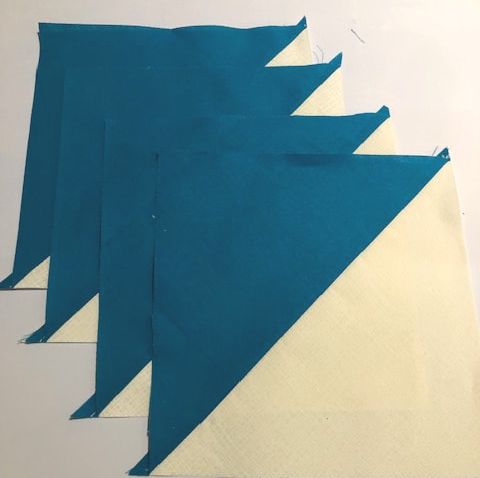
HST (Half Square Triangle) TutorialHSTs can be made 2, 4, 8 or more at a time in short order. No fiddling with small bias edges and corners getting eaten by feed dogs! Follow the steps below to get multiple half square triangles at once! Learning HSTs the fast way is the first step to beginning to create your very own patterns. Mutiple triangles can make almost any shape - many of our lap quilts are HST quilts. See some here.
|
Here is a pdf you can download of full instructions for creating HSTs 2, 4 or 8 at a time! Check back later today for the online version!
| ||
HSTs - 2 at a time
|
Step #1 Stack two squares of fabric right sides together. Mark a diagonal line from corner to corner.
(I use a pencil - however a pen can work as well. This line will be cut later - so there is not likley to be any ink remaining - but I use a pencil just to be safe!) |
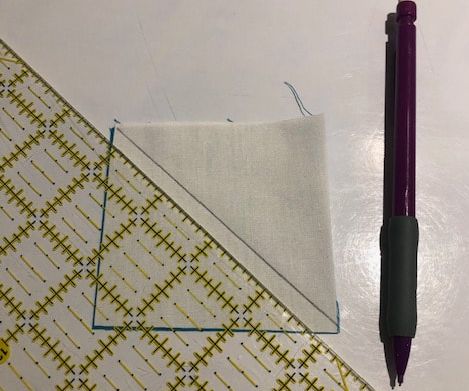
Draw a line - corner to corner - diagonally across
the entire stacked square blocks
|
|
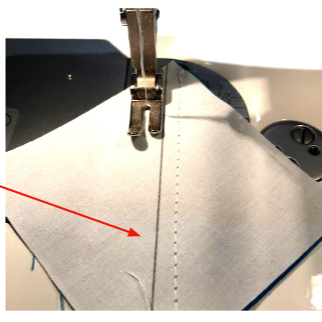
Step 2 - Stitch exactly 1/4 inch away from the marked line. Turn the square and stitch 1/4 inch away from the other side of the marked line.
(TIP: to get a perfect 1/4 inch seam - test a scrap first. You may have to sew a scant 1/4 in because of the fold that happens when you press open) |
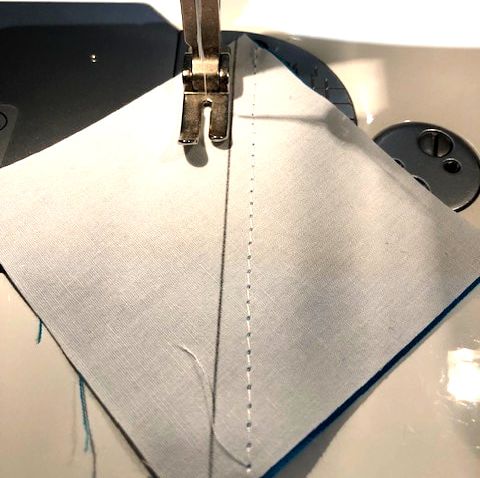
Sew 1/4 inch on either side of the line you drew
|
|
|
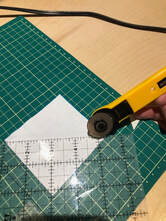
Step 3 - Cut the square in half along the edge to edge line you have drawn. Open each square and press seam to the dark side. (Press - do not stretch while pressing or your triangle will distort as the sewn line is a bias edge)
You can cut with scissors - but I like the accuracy of a rotary cutter! I will show you how to ensure these HSTs are perfectly square in another tutorial. |
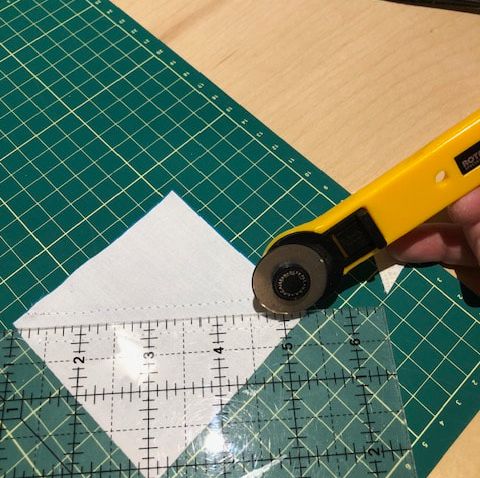
Cut on the line you drew through th center of the sewn lines
|
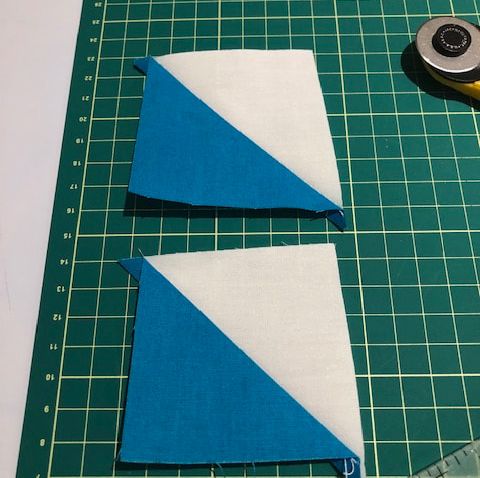
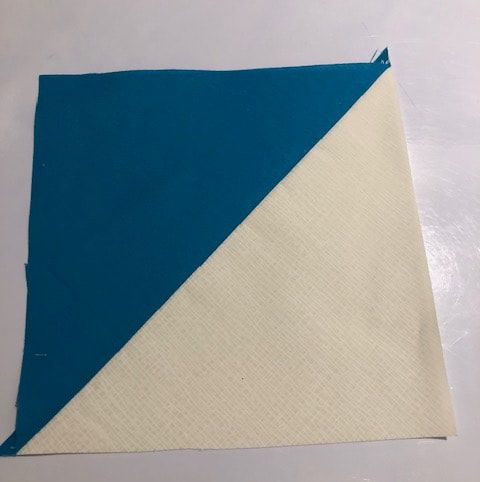
VOILA! (That means "there you are" in french!)
|
|
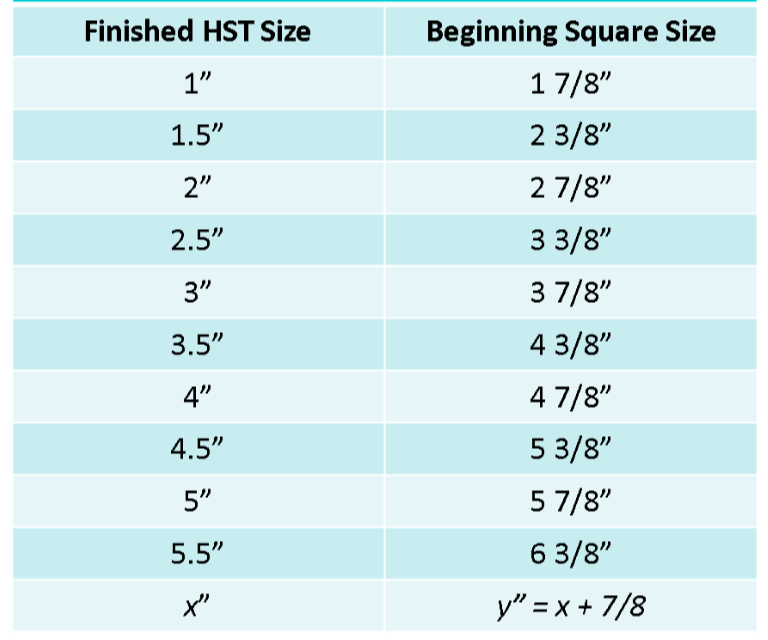
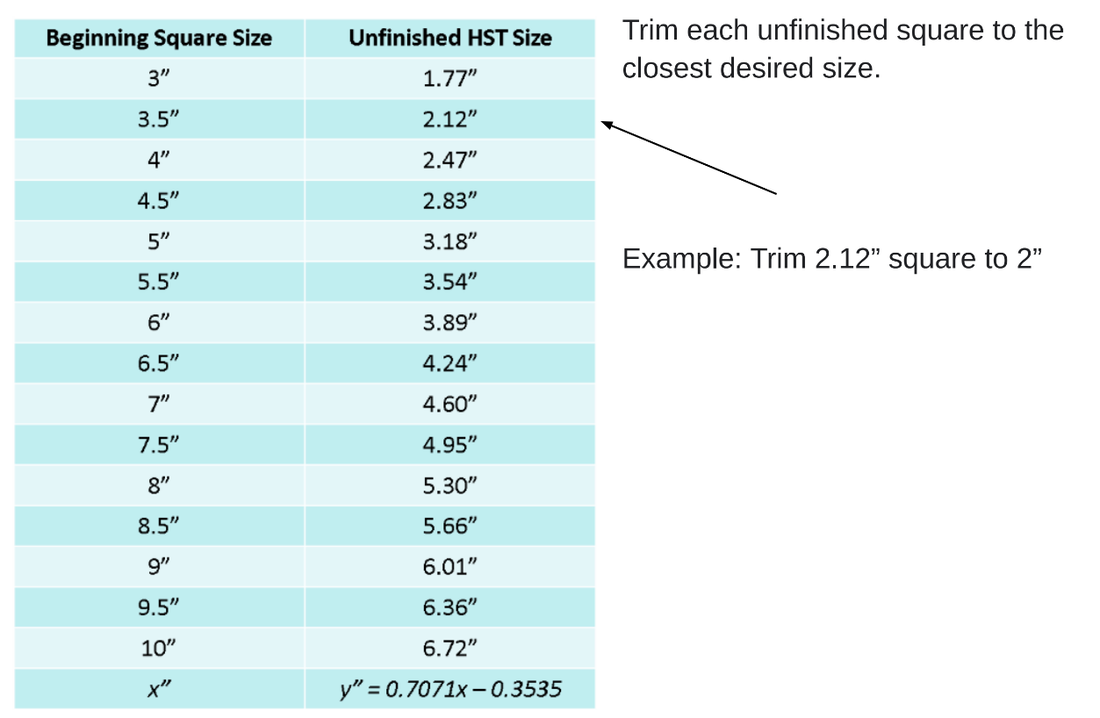
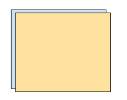
Tip: To determine what size to cut your original square - take the desired size of your finished square and add ⅞ of an inch. Once pressed open - trim to desired finished size.
See chart to the left. |
|
HSTs - 4 at a time
|
This method will give you 4 identical HSTs with one seam
Step 1: Cut 2 different fabrics in a perfect square and place the right sides together. I use 2- 10 inch squares or 2 layer cake pieces. Step 2: Sew ¼ inch around the entire block - so that the block cannot be opened. |
Step #1
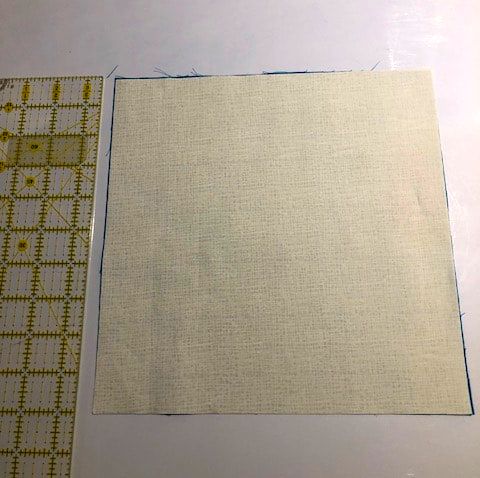
Two pieces - right sides together
|
Step #2
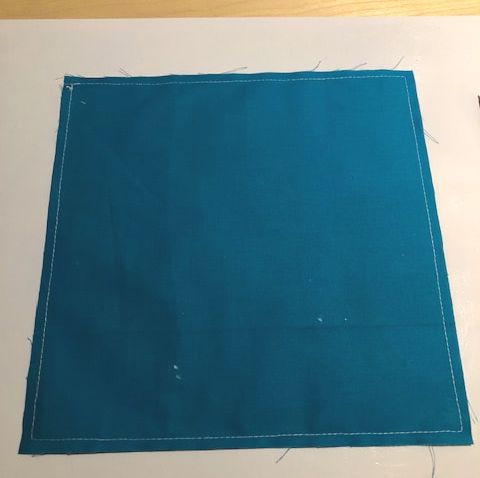
Sew 1/4 inch seam around the entire block. (stitch length 2mm)
|
|
Step 3: Using a rotary cutter - cut the square diagonally from corner to corner twice.
TIP: If you are uncomfortable cutting - draw a line corner to corner x 2 to mark your cutting line. 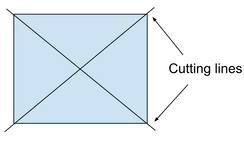
|
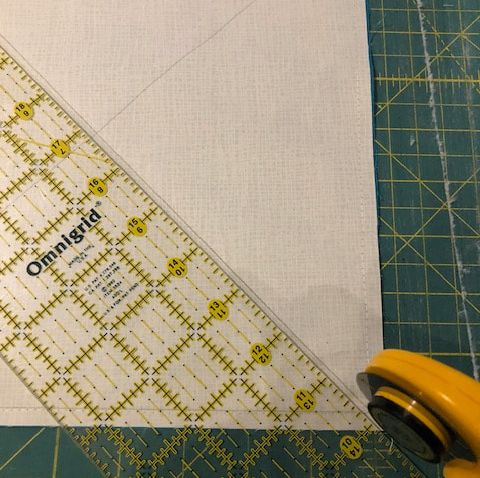
Cut diagonally - corner to corner
|
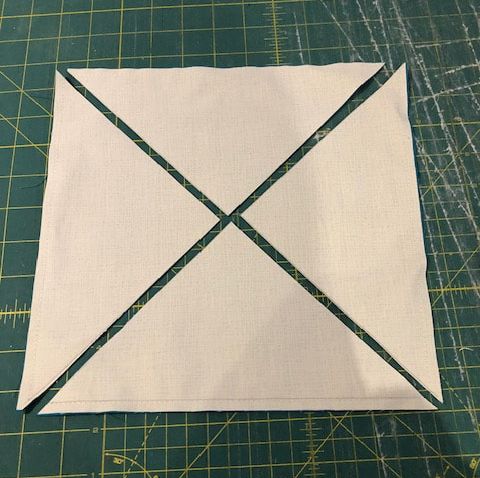
This is how it looks after cutting
|
|
Press all 4 HSTs open without stretching the squares. Press seam to the dark side. A 10 inch original square will yield 4- 6 ½ trimmed squares. Calculations for 4-at-a-time HSTs - see diagram to the left.
|
|
The Grand Finale! HSTs - 8 at a time
 Two pieces - right sides together Two pieces - right sides together
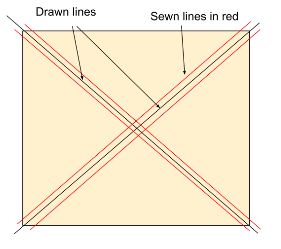
Step 1: Place 2 squares right sides together. Draw a diagonal line corner to corner from all 4 corners
Step 2: Sew ¼ inch seam on each side of the drawn
lines |
Step #2
|
|
Step 3: Cut this large square into quarters from
center to center - see green lines on figure to the right. |
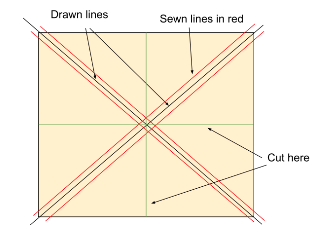
Step #3
|
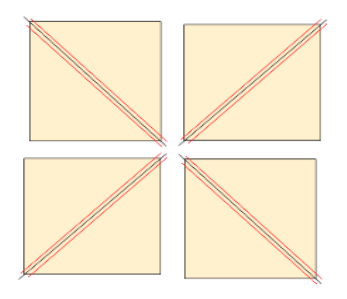
You should have four squares that look like this
|
Step 4: Cut each of these square diagonally along the original drawn line. You should now have
8 HSTs.
8 HSTs.
To calculate the original size of the squares do the following:
EXAMPLE:
For 4 inch HSTs the formula would be:
4+1 = 5 5 x2 = 10
To make 8-4 inch HSTs start with two (2) 10 inch squares.
- Decide what size your finished HST block dimensions should be.
- Take that number and add 1, then multiply by 2. Now you have your starting square size
- You'll need two squares of fabric in that size to make 8 HSTs.
EXAMPLE:
For 4 inch HSTs the formula would be:
4+1 = 5 5 x2 = 10
To make 8-4 inch HSTs start with two (2) 10 inch squares.